Reactジャンプ率ジェネレーターの続きです。前回は環境構築編でした。今回からは具体的な内容に入っていきます。まずotherページをaboutページに変更し、メインページにinputタグ(type = range)を配置しました。それではいきましょう!
【目次】
- 前回のおさらい
- ルーティング設定をotherからaboutに変更
- Innerコンポーネントのスタイルを親コンポーネントで設定
- Aboutコンポーネント作成
- Innerコンポーネントにinput(type="range")タグを配置
- ブラウザの挙動
- 最後に
※参考:前回記事
【React】文字ジャンプ率ジェネレーターを作るシリーズ始動!(環境構築編) - クモのようにコツコツと
※参考:ReactでWebアプリを作るシリーズまとめ
qiita.com
前回のおさらい
Reactアプリスターターキットを元にジャンプ率ジェネレーターのリポジトリを作成。
※参考:【React】文字ジャンプ率ジェネレーターを作るシリーズ始動!(環境構築編) - クモのようにコツコツと
今回から具体的な内容に入っていく。
ルーティング設定をotherからaboutに変更
今回はシングルページでinput(type="range")タグのつまみをいじることで動的に文字のジャンプ率などを変えたるジェネレーターを作る予定。そのため、otherページは不要になる。というか、このotherページをアプリ説明や作者情報などのaboutページに改造したい。
data.jsonのotherキーをaboutキーに変更。テキストも変更。
        "about": {
             "title":"このアプリについて",
             "text": "文字のジャンプ率を動的に変更した画面を確認することができます。"
         },
Headerコンポーネントの/otherリンクを/aboutリンクに変更
          <nav>
             <span>MENU:</span>
             <span><Link to={ homeUrl + "/" }>Home</Link></span>
             <span><Link to={ homeUrl + "/about" }>About</Link></span>
           </nav>
Mainコンポーネントで読み込むdata.jsonのテキストをaboutに変更
const aboutTitle = Data.data.about.title;
const aboutText = Data.data.about.text;
ルーティング設定もotherからaboutに変更
           <Route path={ homeUrl + "/about" }>
             <Helmet>
               <title>{ aboutTitle }</title>
               <meta name="description" content={ aboutText } />
             </Helmet>
             <h1>{ aboutTitle }</h1>
             <p dangerouslySetInnerHTML={{ __html: aboutText }}></p>
           </Route>
index.htmlのリダイレクト設定を/otherから/aboutに変更
    <script>
       const otherPagePath = '/jump-rate-generator/about';
       const path = sessionStorage.getItem('path');
       console.log(path);

       if (path && path === otherPagePath) {
         sessionStorage.removeItem('path');
         window.history.replaceState(null, null, './about');
       }
     </script>
Innerコンポーネントのスタイルを親コンポーネントで設定
Aboutページの内容はボリュームあるのでAboutコンポーネントを作るか。
MainコンポーネントにAboutコンポーネントをインポート
import About from './About';
Aboutのルーティング設定の中でAboutを読み込む
           <Route path={ homeUrl + "/about" }>
             <Helmet>
               <title>{ aboutTitle }</title>
               <meta name="description" content={ aboutText } />
             </Helmet>
             <h1>{ aboutTitle }</h1>
             <p dangerouslySetInnerHTML={{ __html: aboutText }}></p>
             <About /> // 追加
           </Route>
と、ここで気がついたが、Aboutコンポーネントの中のCSSスタイル設定はMainのInnerコンポーネントと共通になる。
          <Route exact path={ homeUrl + "/" }>
            <Helmet>
              <title>{ mainTitle }</title>
              <meta name="description" content={ mainText } />
            </Helmet>
            <h1>{ mainTitle }</h1>
            <p dangerouslySetInnerHTML={{ __html: mainText }}></p>
            <Inner /> // ←これと共通
          </Route>
Innerコンポーネントのスタイル設定も親コンポーネントであるMainコンポーネントで設定するか。
Innerコンポーネントの中のCSSスタイルを削除する。
インポートしていたstyled-componentsとCSS変数のデータvariables.jsonは削除
// import styled from 'styled-components';
//  import cssVariables from './style/variables.json';
CSS変数を設定していた変数variableも削除
// const variable = cssVariables.variable;
スタイル設定している変数SectionTagも削除
// Style
/*  const SectionTag = styled.section`
   & h2 {
     font-size: 1.25em;
     color: ${variable.baseColor};
   }
 `; */
SectionTagコンポーネントはただのsectionタグに戻す
<div className="inner">
       {innerJson.map((innerJson, index) =>
         <section>
           <h2>{ innerJson.title }</h2>
           <p dangerouslySetInnerHTML={{ __html: innerJson.text }}></p>
         </section>
       )}
     </div>
Mainコンポーネントの中で子コンポーネント(Inner、About)のスタイルも設定する。
先ほどInnerコンポーネントで削除したCSS変数のデータvariables.jsonはこちらでインポート
import cssVariables from './style/variables.json';
変数variableでCSS変数を設定
const variable = cssVariables.variable;
スタイル設定SectionTagにInnerコンポーネントで削除したh2タグのスタイル設定も追加する
// Style
const SectionTag = styled.section`
  ${pageSize}
   & h1 {
     font-size: 1.5em;
   }
   & h2 {
     font-size: 1.25em;
     color: ${variable.baseColor};
   }
 `;
Aboutコンポーネント作成
Aboutコンポーネントのファイル「About.tsx」を作成する。
まずReactをインポート
import React from 'react';
コンポーネント部分(とりあえず自分のプロフィールを入れてみる)
 // Component
 function About() {
   return (
     <div className="inner">
         <section>
           <h2>イイダリョウ</h2>
           <p>フロントエンドエンジニア。神奈川に住まう四十路のオジキ。 DTP→Webデザイナーから転向し今に至る。引き続きコツコツの日々。ブログも書いてます。 Webづくり やりたい時が 始め時!</p>
           <ul>
               <li><a href="https://www.i-ryo.com">ブログ</a></li>
               <li><a href="https://twitter.com/idr_zz">Twitter</a></li>
               <li><a href="https://qiita.com/i-ryo">Qiita</a></li>
               <li><a href="https://github.com/ryo-i">GitHub</a></li>
            </ul>
         </section>
     </div>
   );
 }
Aboutコンポーネントをエクスポート
export default About;
ちなみにaタグを別タブで開くtarget="_blank"設定を入れると「noreferrer noopenerをつけろ!」とESLintに怒られた。
攻撃側はwindow.opener.locationを書き換えたりできるようで、怖い。。(noopenerでそれを防げる)
※参考:Reactでaタグの中にtarget='_blank'を書いたらESLintに怒られた話 - Qiita
noreferrerはnoopenerに対応してない古いブラウザでもリファラー情報を見れなくする。しかし、Googleアナリティクスの計測もできなくなったり。。
※参考:参照元が確認できない?ノーリファラーの原因と対策方法 - リスマガ【Web集客の教科書】
そもそも他のサイトへの離脱を避けたいという色気から別タブにしたくなるのだが、ユーザーが自分の意思で同タブ別タブを選べないのもベストとはいえない。とりあえず今回はtarget="_blank"自体を付けるのをやめてみた。
Innerコンポーネントにinput(type="range")タグを配置
次はメインページの内容を変更する。
まずdata.jsonのmainキーのテキストを変更(ジャンプ率ジェネレーターの内容に)
"main": {
             "title":"ジャンプ率ジェネレーター",
             "text": "行長、行間、ジャンプ率などを変えてみてください。"
         },
今回、InnerコンポーネントはHelloモジュールは読み込まないので削除
// import { hello } from './modules/hello/hello';
useEffectも使わないので削除
// import React, { useEffect }  from 'react';
import React  from 'react';
useEffect()、hello()も削除
  /* useEffect(() => {
     hello();
   }); */
data.jsonのテキストは読み込まないので削除
// import Data from './data/data.json';
data.jsonを読み込んでた変数innerJsonも削除
// const innerJson = Data.data.inner;
Innerコンポーネント、data.jsonを読み込んでた部分は削除して、代わりにinput(type="range")タグを配置
    <div className="inner">
       // {innerJson.map((innerJson, index) =>
         <section>
           // <h2>{ innerJson.title }</h2>
           // <p dangerouslySetInnerHTML={{ __html: innerJson.text }}></p>
           <h2>行長</h2>
           <input type="range" name="range" min="10" max="50" value="35"></input>
         </section>
         <section>
           <h2>行間</h2>
           <input type="range" name="range" min="1" max="2.5" value="1.75" step="0.01"></input>
         </section>
         <section>
           <h2>ジャンプ率</h2>
           <input type="range" name="range" min="100" max="400" value="200"></input>
         </section>
     //  )}
     </div>
minで最小値、maxで最大値、valueで初期値を入れている。
※参考:【Tone.js】いろいろなリズムが鳴らせるビート・プレイヤーを作った(BPM切り替え可能) - クモのようにコツコツと
input(type="range")タグの幅がデフォルトだと短かったのでスタイル設定をしたい。
styled-componentsをインポート
import styled from 'styled-components';
inputタグのスタイルをInputRangeコンポーネントに設定
// Style
 const InputRange = styled.input`
   width: 50%;
 `;
inputタグをInputRangeコンポーネントに変更
        <section>
           <h2>行長</h2>
           <InputRange type="range" name="range" min="10" max="50" value="35"></InputRange>
         </section>
         <section>
           <h2>行間</h2>
           <InputRange type="range" name="range" min="1" max="2.5" value="1.75" step="0.01"></InputRange>
         </section>
         <section>
           <h2>ジャンプ率</h2>
           <InputRange type="range" name="range" min="100" max="400" value="200"></InputRange>
         </section>
ブラウザの挙動
ブラウザで挙動を確認する。
※参考:React App
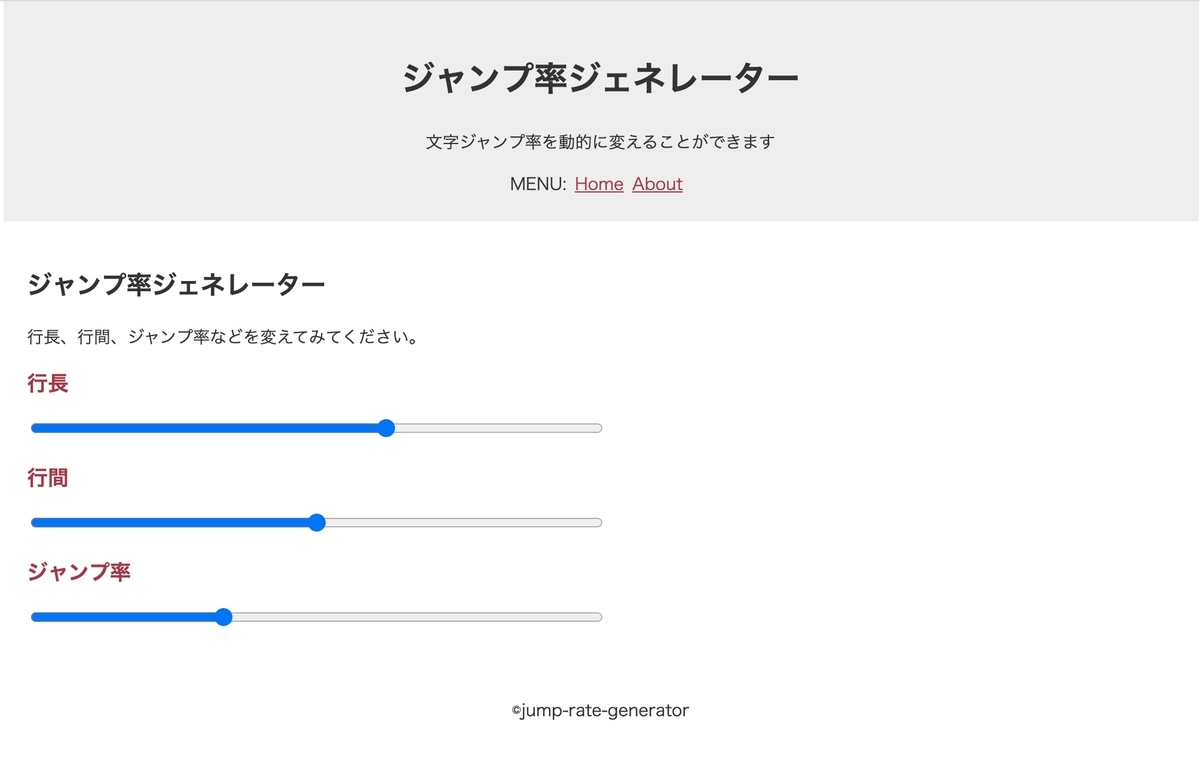
メインページがinput(type="range")タグになった!

しかしながら…rangeのつまみを触っても動かない。。
コンソールを見るとこのようなエラーが
Warning: You provided a `value` prop to a form field without an `onChange` handler. This will render a read-only field. If the field should be mutable use `defaultValue`. Otherwise, set either `onChange` or `readOnly`.
警告:
onChangeハンドラーなしでフォームフィールドにvalueプロパティを指定しました。 これにより、読み取り専用フィールドがレンダリングされます。 フィールドを変更可能にする必要がある場合は、defaultValueを使用します。 それ以外の場合は、onChangeまたはreadOnlyのいずれかを設定します。
どうやらonChangeによるhandlerの設定が必要な模様。このあたり、次回、取り組みたい。
※参考:フォーム – React
handlerとはReactでのイベントハンドラ設定と思う。
※参考:イベント処理 – React
onChangeはここらへんか。
※参考:フォーム – React
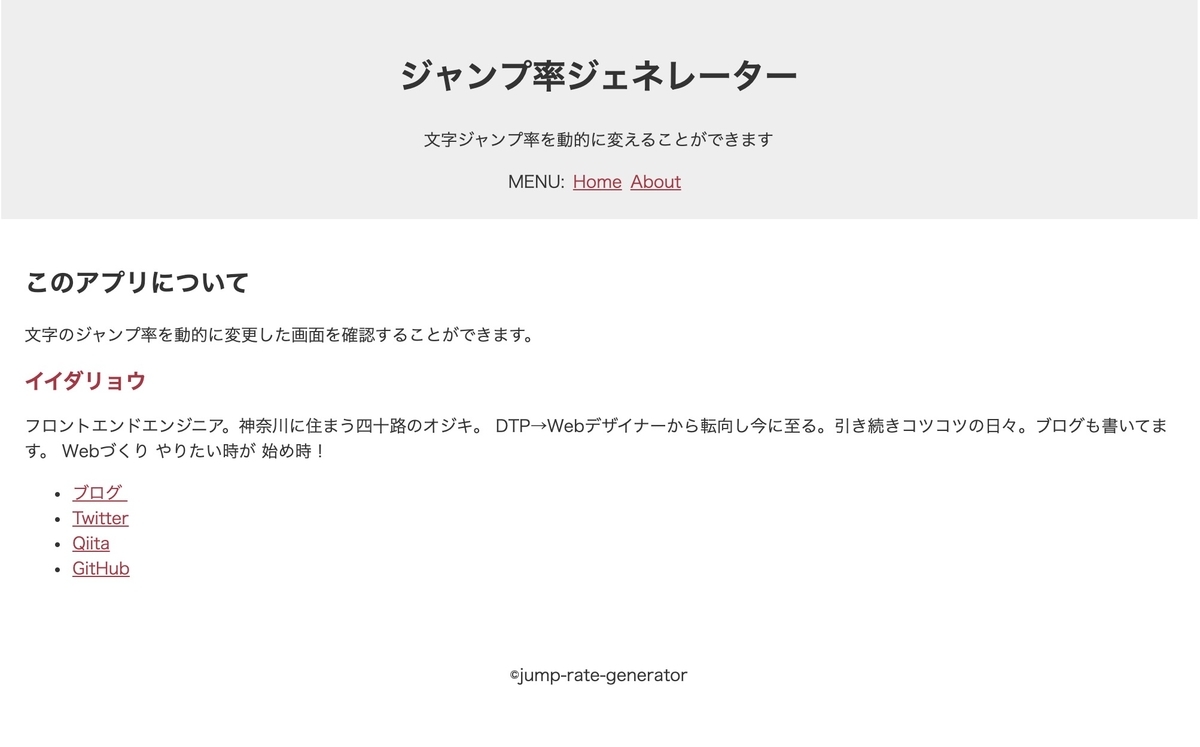
Aboutページを開いてみると、おお、自分のプロフィールに変わっている!

直リンクで開いても、リロードしてもメインページにならない。リダイレクト設定が効いている♪
※参考:https://ryo-i.github.io/jump-rate-generator/about
また、親コンポーネントに設定したCSS設定も効いている。
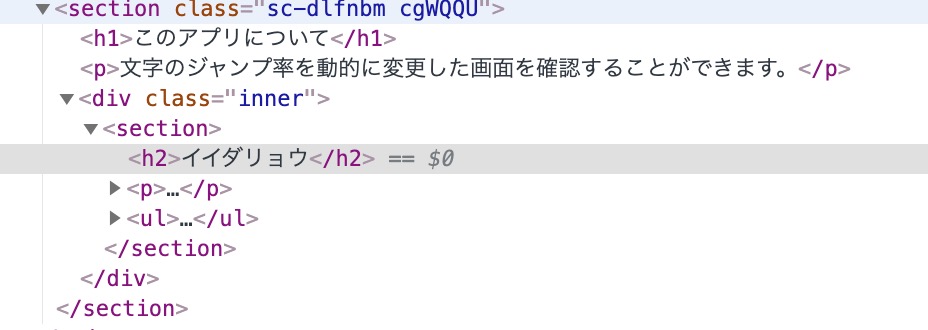
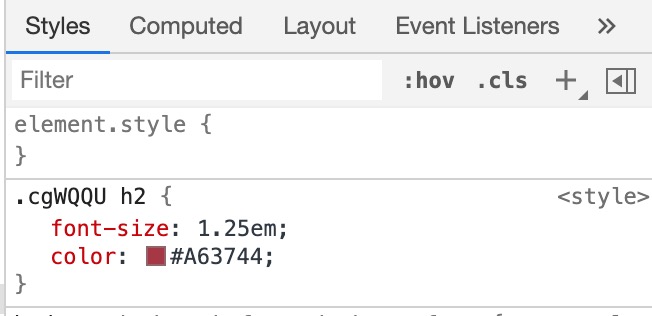
CSS in JSの固有class名.cgWQQUは親コンポーネントのsectionに付いており

子コンポーネントのh2タグは.cgWQQU h2というセレクタ指定になっている。

このように複数のコンポーネントに共通させたいスタイルは親コンポーネントの方に設定すると楽なことがわかった。
ここまでのコード(GitHub)
※参考:GitHub - ryo-i/jump-rate-generator at c051378575cb2c95d037fe6506149793f7182890
プレビュー(GitHub Pages)
※参考:React App
最後に
ということで、今回はAboutページ作成とinput(type="range")タグ配置を行いました。ファイル構成的にはよりわかりやすくリファクタリングできたかなと思います。
まだrangeのつまみが動かないので次回イベントハンドラ設定に取り組みたく思います。それではまた!
※参考:ReactでWebアプリを作るシリーズまとめ
qiita.com
