Next.jsの続きです。前回はNext.jsのリンク設定(Link)、共通コンポーネント化、headタグ設定(Head)を行いました。今回はNext.jsが用意しているパッケージCreate Next Appを使ってみます。さらにTypeScriptとCSS in JS(styled-components)もインストールしてみたく。それではいきましょう!
【目次】
- 前回のおさらい
- create next appをインストール
- TypeScriptをインストール
- CSS in JS(Styled Components)をインストール
- 別ページ(other.tsx)を作る
- 最後に
※参考:前回記事
【React】Next.jsのリンク設定(Link)、共通コンポーネント化、headタグ設定(Head) - クモのようにコツコツと
※参考:Reactを習得するためにやったことまとめ
qiita.com
前回のおさらい
Next.jsのリンク設定(Link)、共通コンポーネント化、headタグ設定(Head)
Next.jsの基本的な仕組みはイメージできてきた♪
※参考:前回記事
【React】Next.jsのリンク設定(Link)、共通コンポーネント化、headタグ設定(Head) - クモのようにコツコツと
create next appをインストール
create next appはNext.jsが用意しているパッケージ環境。create react appと名前が似ているなー。
Next.js事始めの時にはいったん回避していた。
※参考:【React】Next.jsを事始める(インストール、ページ設定、表示まで) - クモのようにコツコツと
今回はこちらを使って環境構築してみる!
create next appインストール!
$ npx create-next-app
そうするとアプリ名を聞いてくるのでcreate-react-app-testと入力してみる
? What is your project named? › create-react-app-test
インストール開始…(しばらく待つ)
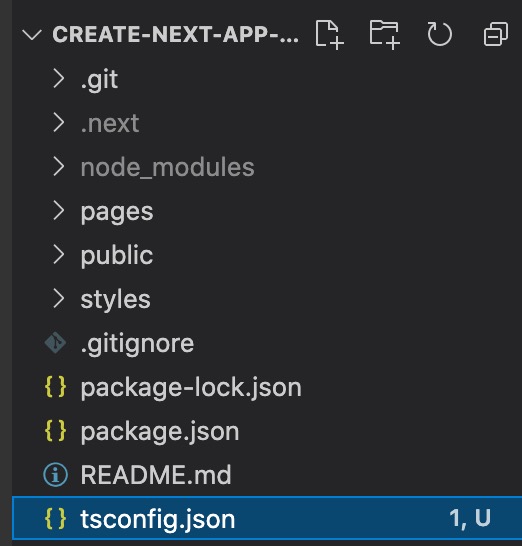
「create-react-app-test」フォルダが作られた!
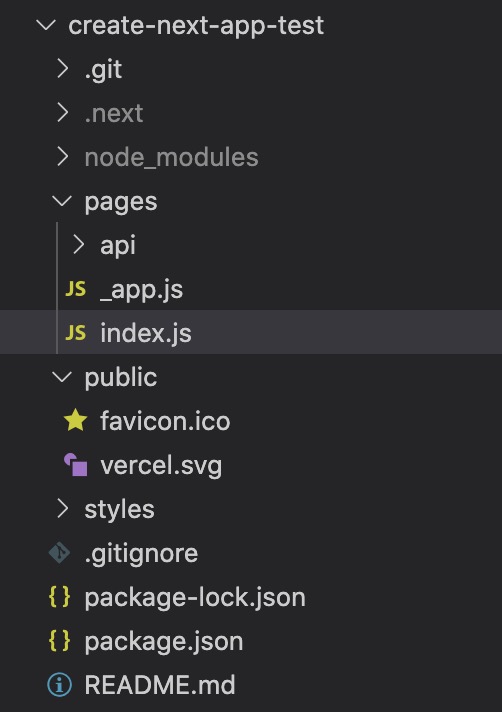
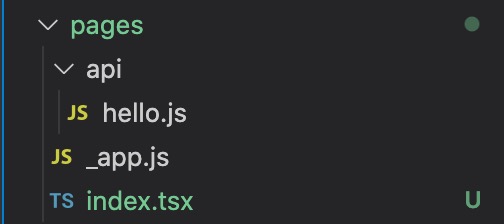
/pagesフォルダにページファイルがある/publicフォルダに画像などの静的なファイルがある/stylesフォルダにCSSファイルがある
/pagesフォルダの中にある_app.jsはアプリ全体に渡るグローバルな設定を書くファイルのようだ。
※参考:Advanced Features: カスタム`App` | Next.js
※参考:Basic Features: CSS のビルトインサポート | Next.js
package.jsonには最初からコマンドが入っていた
  "scripts": {
    "dev": "next dev",
    "build": "next build",
    "start": "next start"
  },
「create-react-app-test」フォルダフォルダに移動
$ cd create-react-app-test
開発モードで起動
$ npm run dev
ブラウザでhttp://localhost:3000/を開くとページが表示された!
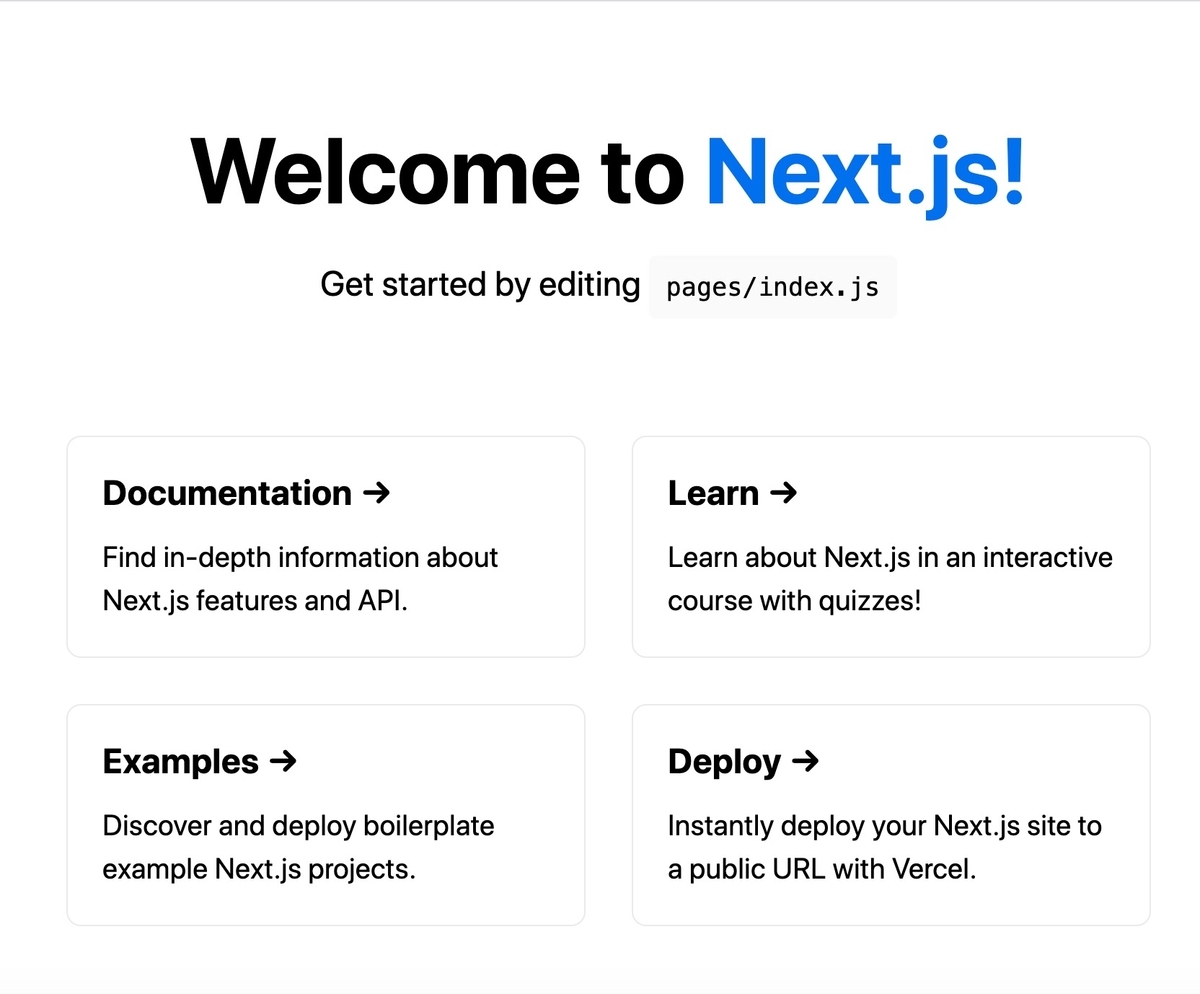
index.jsのJSX部分
export default function Home() {
   return (
     <div className={styles.container}>
       <Head>
         <title>Create Next App</title>
         <link rel="icon" href="/favicon.ico" />
       </Head>

       <main className={styles.main}>
         <h1 className={styles.title}>
           Welcome to <a href="https://nextjs.org">Next.js!</a>
         </h1>
        // 後略
headタグのfaviconのパスを見るに/publicフォルダに入れたファイルはルートパス/扱いになるようだ。
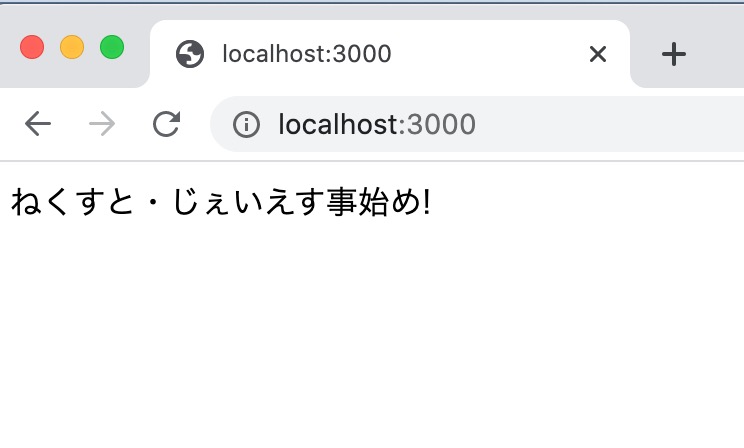
index.jsの文字を打ち替えてみる。
export default function Home() {
  return (
    <div className={styles.container}>
      <Head>
        <title>ようこそ、ねくすと・じぇいえすへ</title>
        <link rel="icon" href="/favicon.ico" />
      </Head>

      <main className={styles.main}>
        <h1 className={styles.title}>
          ようこそ、<a href="https://nextjs.org">ねくすと・じぇいえすへ!</a>
        </h1>
        // 後略
文字が打ち変わった!
TypeScriptをインストール
次にTypeScriptをインストールしてみる。
※参考:Basic Features: TypeScript | Next.js
TypeScriptの設定ファイル「tsconfig.json」を作成するコマンド
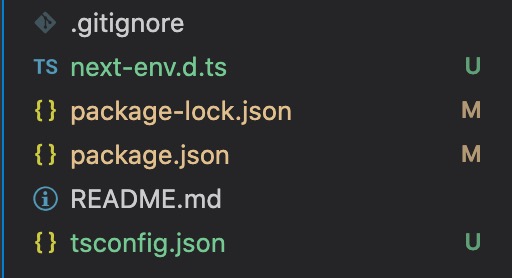
$ touch tsconfig.json
「tsconfig.json」が作成された!(中身はまだない)
開発モードで起動
$ npm run dev
こんなメッセージが。
It looks like you're trying to use TypeScript but do not have the required package(s) installed.
Please install typescript and @types/react by running:
npm install --save-dev typescript @types/react
TypeScriptを使用しようとしているようですが、必要なパッケージがインストールされていません。
次のコマンドを実行して、typescriptと@ types / reactをインストールしてください。
         npm install --save-dev typescript @ types / react
@types/reactが必要だよと。
いるのなら、インストールしようぞホトトギス。
$ npm install --save-dev typescript @types/react
package.jsonに追加された!
  "devDependencies": {
    "@types/react": "^17.0.3", // 追加
    "typescript": "^4.2.4" // 追加
  }
これで、ファイルを .js から .tsx に変換し、TypeScript の利点を活用する準備が整いました!
ふむ。整ったなら、変えてみせようホトトギス。
ページファイル「index.js」を「index.tsx」に打ち替えてみる。
開発モードで起動リベンジ!
$ npm run dev
ページの表示は特に変化はないのだが
ルート直下に「next-env.d.ts」が新規作成された。
「next-env.d.ts」の内容
/// <reference types="next" />
/// <reference types="next/types/global" />
空だった「tsconfig.json」にも設定が増えている!
{
  "compilerOptions": {
    "target": "es5",
    "lib": [
      "dom",
      "dom.iterable",
      "esnext"
    ],
    "allowJs": true,
    "skipLibCheck": true,
    "strict": false,
    "forceConsistentCasingInFileNames": true,
    "noEmit": true,
    "esModuleInterop": true,
    "module": "esnext",
    "moduleResolution": "node",
    "resolveJsonModule": true,
    "isolatedModules": true,
    "jsx": "preserve"
  },
  "include": [
    "next-env.d.ts",
    "**/*.ts",
    "**/*.tsx"
  ],
  "exclude": [
    "node_modules"
  ]
}
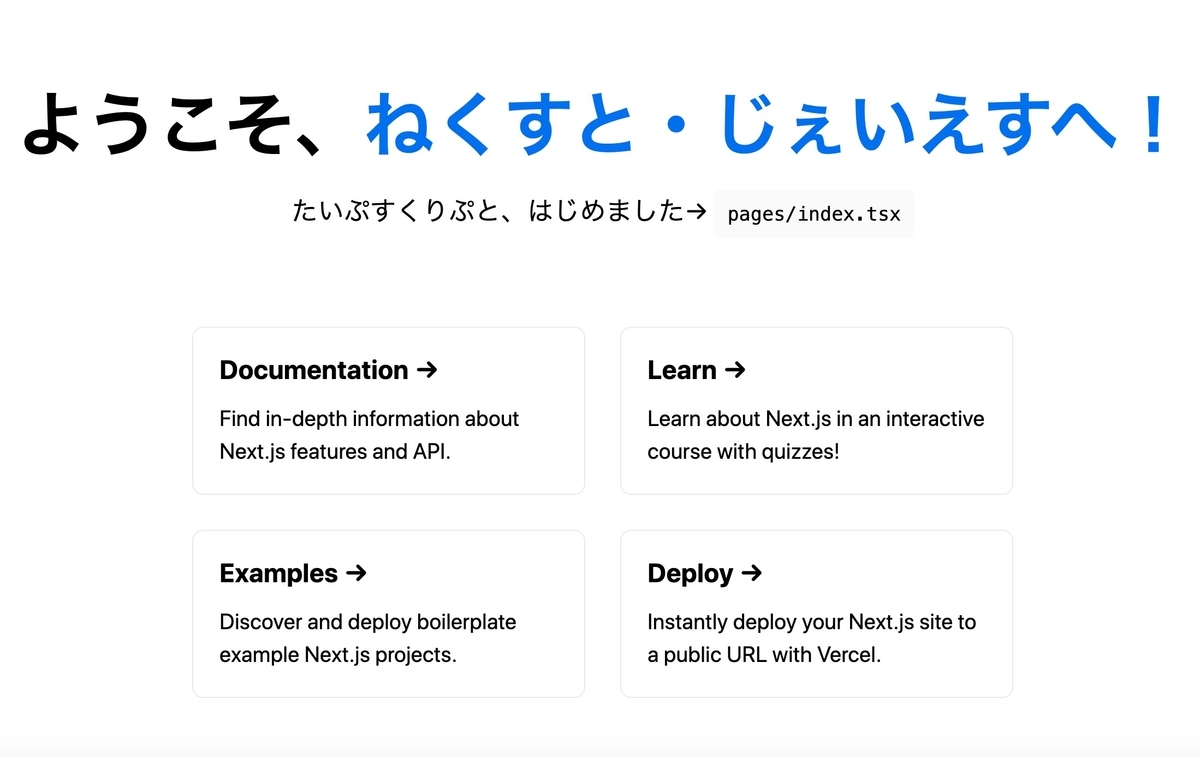
index.tsxのテキストを打ち替えてみる。
        <p className={styles.description}>
          たいぷすくりぷと、はじめました→{' '}
          <code className={styles.code}>pages/index.tsx</code>
        </p>
おお、反映された!
CSS in JS(Styled Components)をインストール
次にCSS in JSを追加せんと欲す。Create React Appの時と同じくStyled Componentsね。
たぶんだけどCreate React Appと同じ手順でインストールきるんじゃないかと思ふ。
※参考:【React】React + TypeScript + CSS in JSの開発環境を作る(Gitエラー対処も) - クモのようにコツコツと
styled-componentsをインストール
$ npm install --save styled-components
TypeScript環境なので@typesも必要なはず。
$ npm i --save-dev @types/styled-components
package.jsonに追加された!
  "dependencies": {
    "next": "10.1.3",
    "react": "17.0.2",
    "react-dom": "17.0.2",
    "styled-components": "^5.2.3" // 追加
  },
  "devDependencies": {
    "@types/react": "^17.0.3",
    "@types/styled-components": "^5.1.9", // 追加
    "typescript": "^4.2.4"
  }
さっそくCSSを設定してみる。
index.tsxにstyled-componentsをインポート
import styled from 'styled-components';
Spanコンポーネントにspanタグ用のCSSを設定
const Span = styled.span`
  color: red;
  background: #eee;
  padding: 5px;
`;
pタグの中にSpanコンポーネントを追加
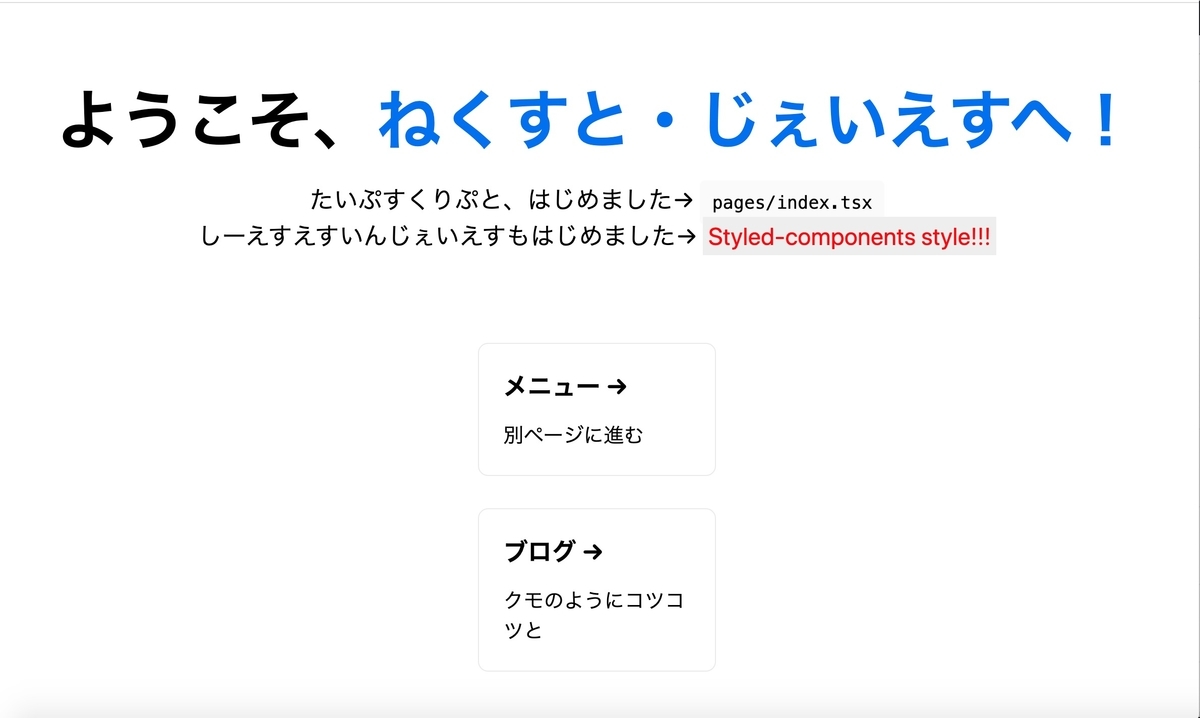
        <p className={styles.description}>
          たいぷすくりぷと、はじめました→{' '}
          <code className={styles.code}>pages/index.tsx</code><br />
          しーえすえすいんじぇいえすもはじめました→{' '}
          <Span>Styled-components style!!!</Span>
        </p>
ブラウザを見ると、おお、スタイルが適用された!

別ページ(other.tsx)を作る
最後にせっかくなのでNext.jsらしく複数ページ構成にしよう。
index.tsxにLinkコンポーネントをインポート
import Link from 'next/link'
Headコンポーネントにdescription追加
      <Head>
        <title>ようこそ、ねくすと・じぇいえすへ</title>
        <meta name="twitter:description" content="Next.js + TypeScript + CSS in JS環境です"/>
        <link rel="icon" href="/favicon.ico" />
      </Head>
Linkコンポーネントで別ページへのリンクを作成
<div className={styles.grid}> <Link href="/other"> <a className={styles.card}> <h3>メニュー →</h3> <p>別ページに進む</p> </a> </Link> <a href="https://www.i-ryo.com/entry/2021/04/23/071217" className={styles.card}> <h3>ブログ →</h3> <p>クモのようにコツコツと</p> </a> </div>
ついでにブログのリンクも追加したのはご愛嬌w
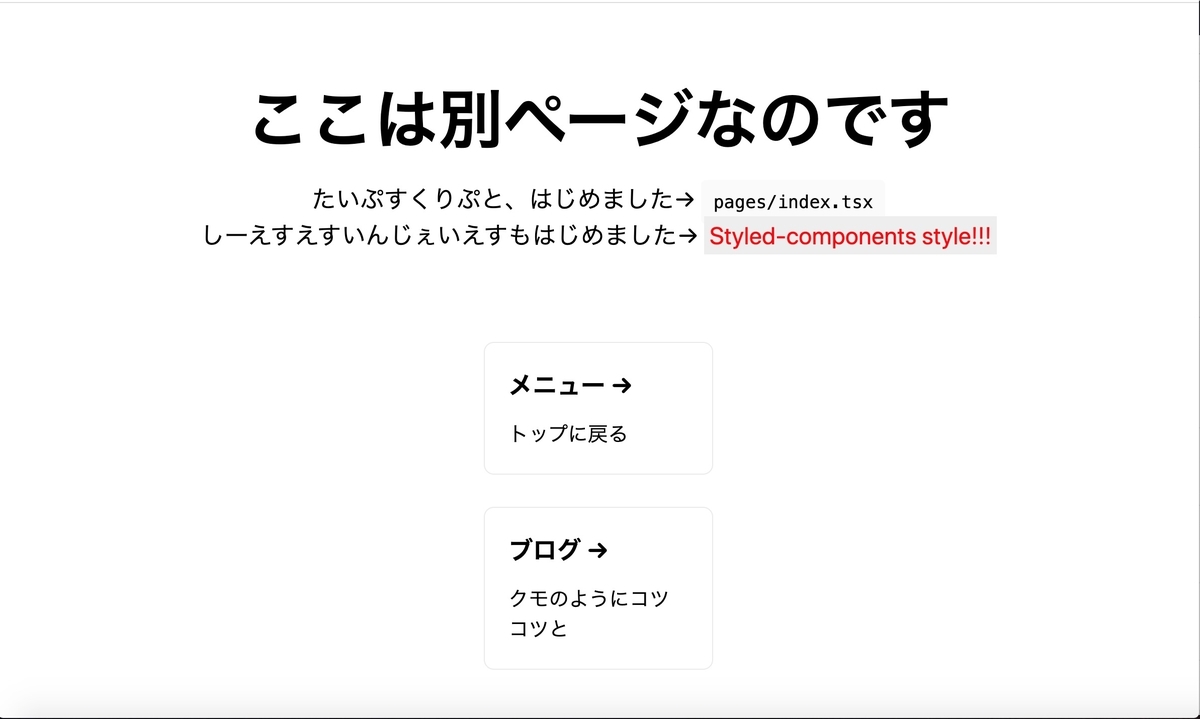
別ページのファイル「other.tsx」を作る。 index.tsxの改造版
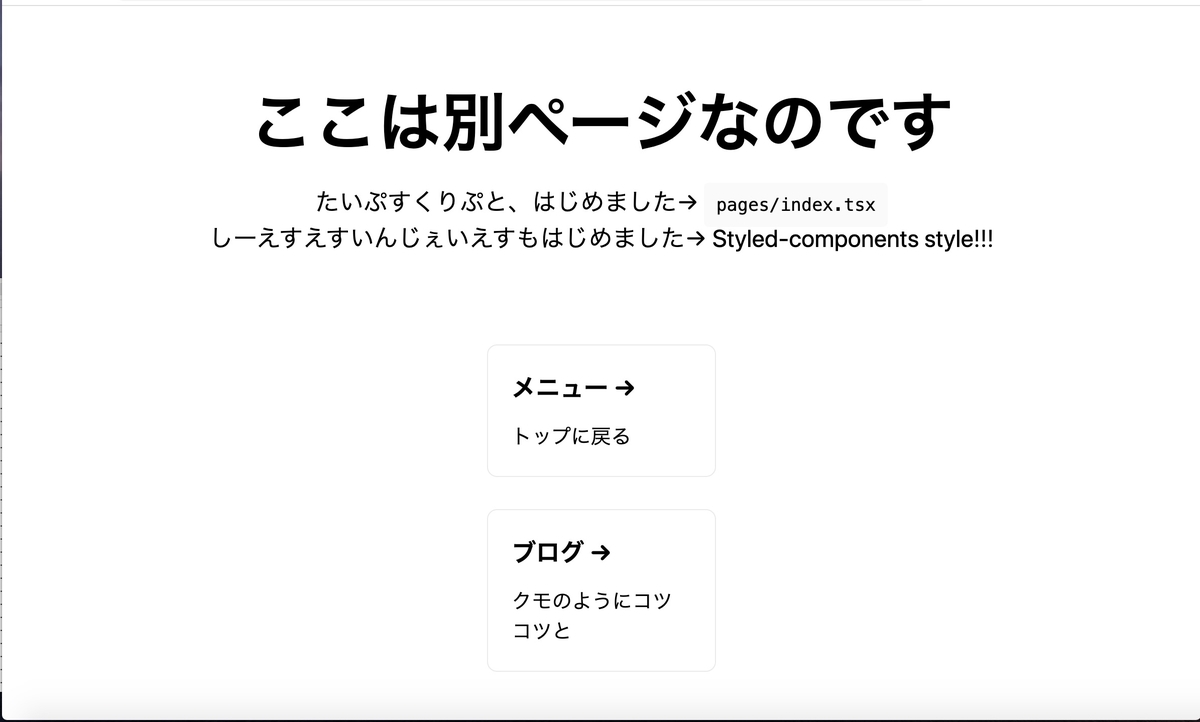
import Head from 'next/head' import Link from 'next/link' import styled from 'styled-components'; import styles from '../styles/Home.module.css' const Span = styled.span` color: red; background: #eee; padding: 5px; `; export default function Other() { return ( <div className={styles.container}> <Head> <title>別ページ</title> <meta name="twitter:description" content="ここは別ページなのです"/> <link rel="icon" href="/favicon.ico" /> </Head> <main className={styles.main}> <h1 className={styles.title}> ここは別ページなのです </h1> <p className={styles.description}> たいぷすくりぷと、はじめました→{' '} <code className={styles.code}>pages/index.tsx</code><br /> しーえすえすいんじぇいえすもはじめました→{' '} <Span>Styled-components style!!!</Span> </p> <div className={styles.grid}> <Link href="/"> <a className={styles.card}> <h3>メニュー →</h3> <p>トップに戻る</p> </a> </Link> <a href="https://www.i-ryo.com/entry/2021/04/23/071217" className={styles.card}> <h3>ブログ →</h3> <p>クモのようにコツコツと</p> </a> </div> </main> <footer className={styles.footer}> <a href="https://vercel.com?utm_source=create-next-app&utm_medium=default-template&utm_campaign=create-next-app" target="_blank" rel="noopener noreferrer" > Powered by{' '} <img src="/vercel.svg" alt="Vercel Logo" className={styles.logo} /> </a> </footer> </div> ) }
ブラウザ挙動
index.tsxに別ページへのリンクが追加された!
Dev-ToolsのSorcesを確認するとheadタグにtitle、descriptionが静的に設定されている♪
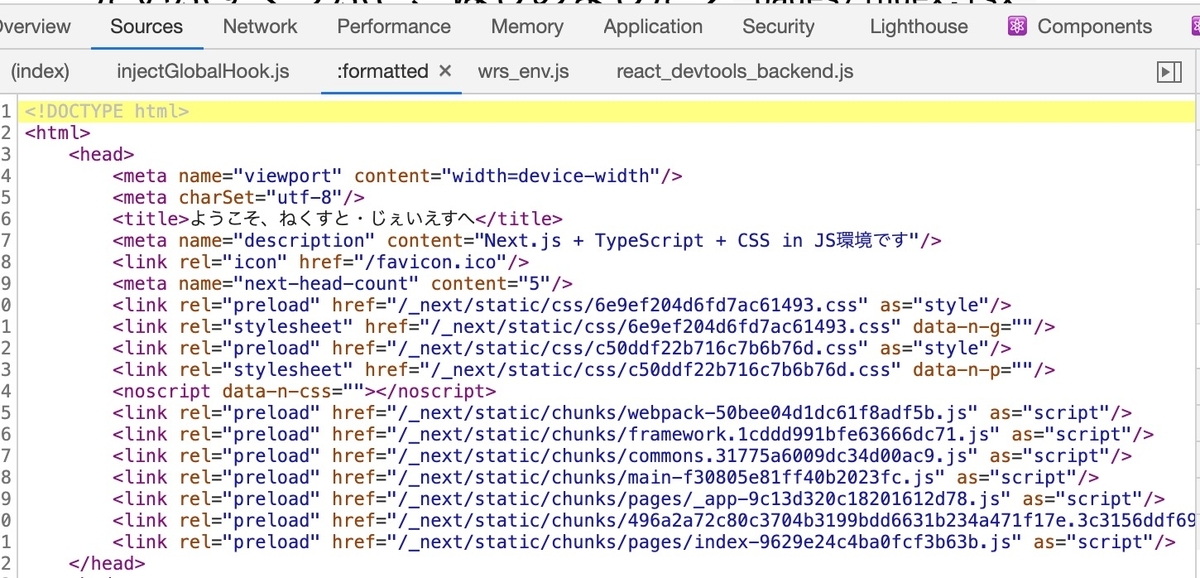
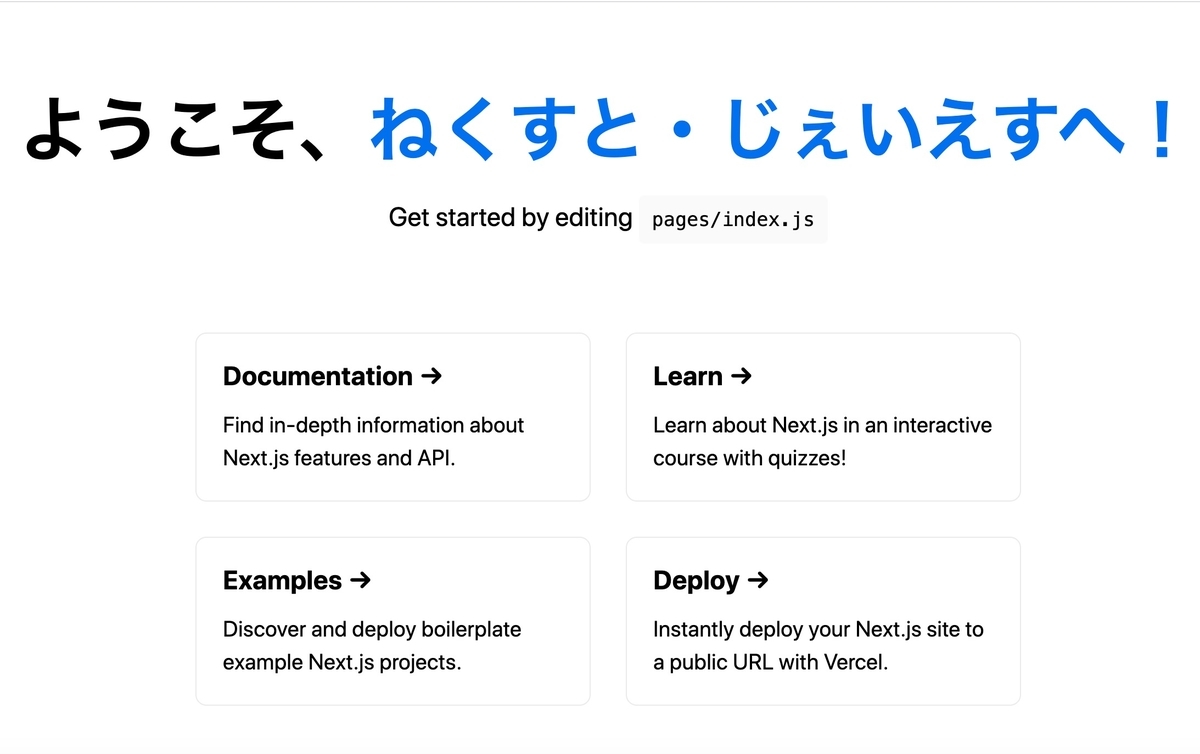
※参考:ようこそ、ねくすと・じぇいえすへ
「別ページに進む」をクリックすると別ページに遷移する
SPAとして遷移しているためheadタグはTopページのままだが
リロードするとちゃんと別ページのtitle、descriptionが静的に設定されている♪
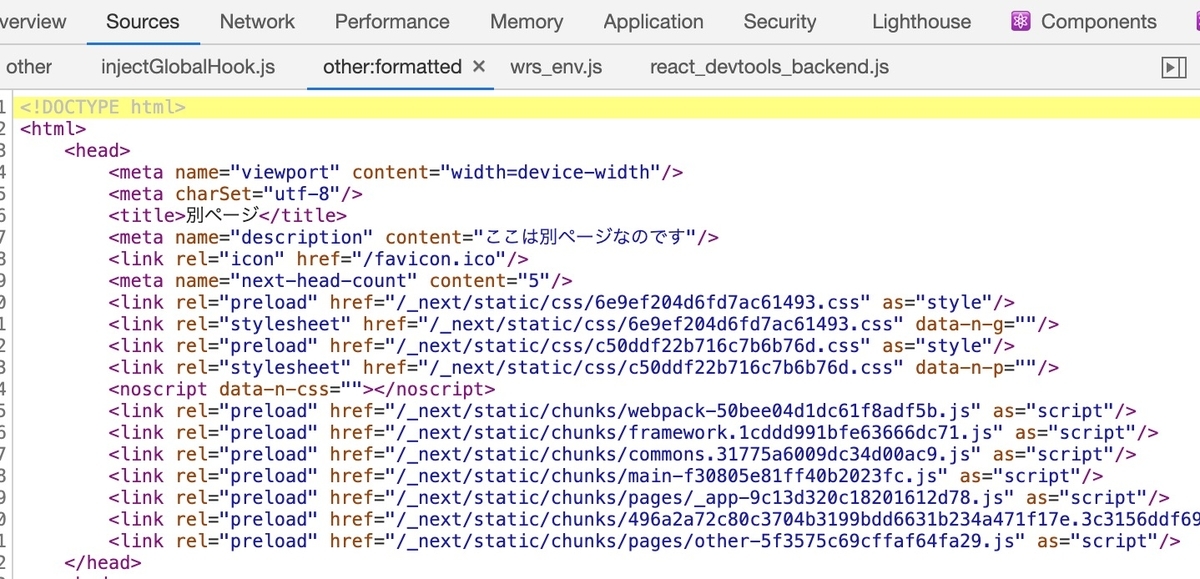
※参考:別ページ
ソースコード
※参考:GitHub - ryo-i/create-next-app-test
プレビュー
※参考:ようこそ、ねくすと・じぇいえすへ
ちなみにローカル環境だと別ページでリロードしたときにStyle-componentsのスタイルがリセットされるようだった(デプロイしたVercel上ではそういう現象は起こらなかった)
最後に
ということでCreate Next App環境を構築し、TypeScriptとCSS in JS(Styled-components)をインストールしました。複数ページ構成にしてheadタグが静的に設定されていることも確認できました。
Create React Appの時よりもスムーズに実装できたので、経験を重ねるほどに慣れてやりたいことが早く実現できそうに感じられました♪
次は、以前Create React Appで作ったReactアプリスターターキットをCreate Next App環境で再現してみたく思います。この時にうまくいかなかったOGP設定もうまくいくのではないかという気がしています(この時の経験がNext.jsを始めたくなったきっかけだったので)。
※参考:【React】OGPはつらいよ ーSPAでの動的OGP・失敗編ー(Reactアプリスターターキット) - クモのようにコツコツと
それではまた!
※参考:Reactを習得するためにやったことまとめ
qiita.com